
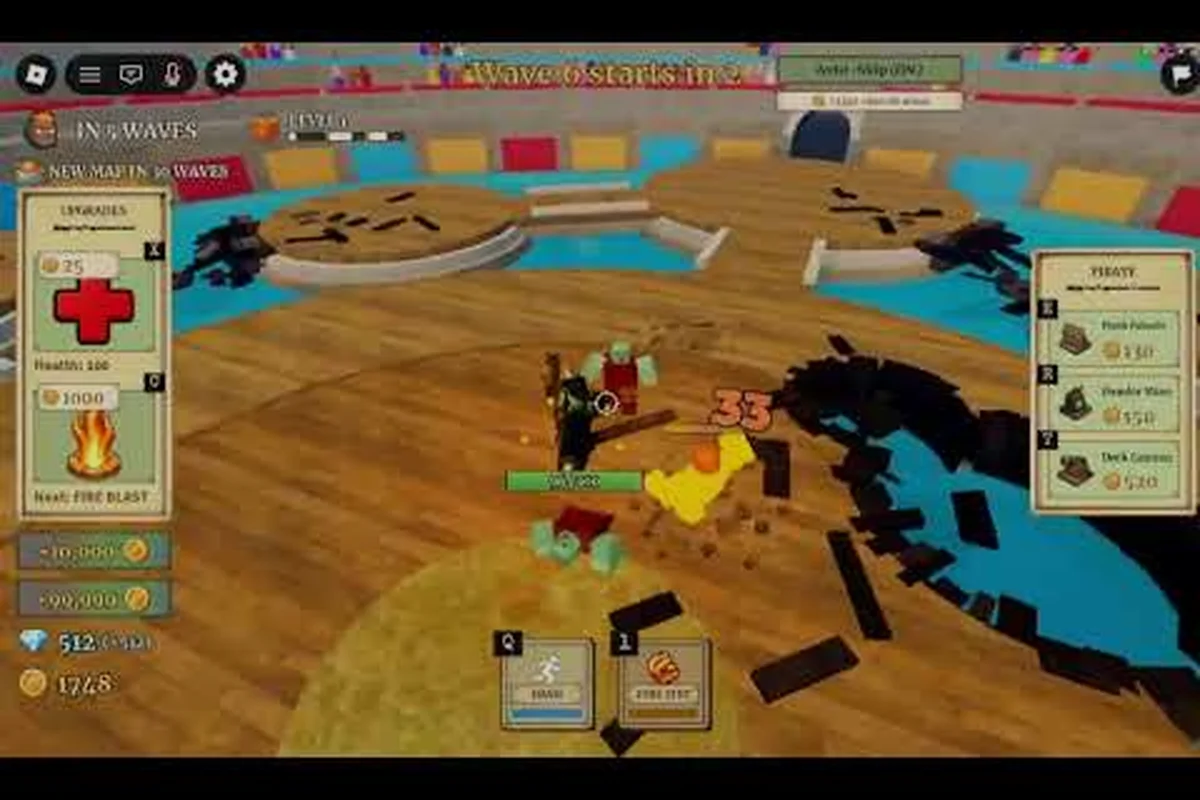
Leveling up fast in Fruit Zombie Survival comes down to sequencing your first three sessions correctly, because the run before Wave 10 is where most accounts either build a real power base or fall behind the Berry curve. Players who hit the Corrida Colosseum with a planned build routinely clear Wave 10, bank the boss drop, then pivot straight into a diamond farm loop that returns roughly 19,000 diamonds per hour. The Fruit Zombie Survival best way to level up is not a single trick; it is a short, repeatable playbook that turns early-game chaos into measured progression.
Why a Planned Early-Game Routine Changes Everything
A typical first session in Fruit Zombie Survival follows a familiar arc: spawn in, pick a random Devil Fruit, survive a few waves on instinct, die around Wave 6 or 7, and respawn with no clear plan. The account technically "levels," but every reset burns the upgrade gold earned in that run, so the player is effectively running in place. According to the Fruit Zombie Survival official Roblox page, 20 Devil Fruits, special bosses every few waves, and a Berries loop define the core economy, and the difference between a stuck account and a climbing one is almost always how that economy is sequenced.
A planned routine, by contrast, treats every run as a building block. Each session has a defined goal, a target build, and a checkpoint at the end. Players who follow a structured plan report reaching their first permanent upgrades roughly 40-50% faster than players who freestyle, based on community feedback gathered across Pro Game Guides and Discord threads. The result is the same wave clears, but the gap between them shrinks every session.
| Routine Style | Avg. Time to First Permanent Upgrade | Diamond Bank at Hour 2 | Wave 10 Clear Rate |
|---|---|---|---|
| Freestyle / Random | 45-60 min | <5,000 | ~35% |
| Planned 3-Session Plan | 20-30 min | 12,000-19,000 | ~70% |
The Core Leveling Loop Explained
How XP, Berries, and Diamonds Actually Connect
The leveling economy in Fruit Zombie Survival runs through three layered currencies. Berries drop during combat and feed the in-run upgrade shop, which resets every time you die or manually reset. Diamonds are the cross-run currency awarded for completing waves, killing bosses, and running the Colosseum farm. The third layer is permanent stat growth, which is what "leveling up" really means: stronger baseline HP, damage, and ability cooldowns that survive a reset.
The connection point is the wave 10 boss. Killing the Dune Marauder banks a large diamond payout and unlocks access to the Corrida Colosseum farm, which is the most reliable diamond source in the game. From that point forward, every run can either push progression (push past Wave 10 into harder content) or farm (reset after Wave 10 to bank diamonds). Knowing which to pick each session is the heart of the Fruit Zombie Survival best way to level up.
Run Types and When to Use Each
Not every run should look the same. The three core run types each serve a different purpose, and rotating between them is what makes an account grow consistently.
| Run Type | Goal | Stop Point | Best For |
|---|---|---|---|
| Progression Run | Push to new highest wave | When you die or hit a wall | Sessions 1-2 |
| Boss Banking Run | Clear Wave 10, grab boss drop | Right after Dune Marauder | Sessions 2-3 |
| Diamond Farm Run | Maximize diamonds per hour | Reset on Wave 10 kill | Sessions 3+ |
The Colosseum solo farm documented by All Things How — solo party, Auto-Skip on, Fire Fist spam — is the gold standard for Diamond Farm Runs and is the engine that funds every later upgrade. Mixing all three run types is the simplest way to keep the account climbing without burning out on any single grind.
Building the Right Loadout for Fast Leveling
Fruit and Weapon Pairings That Scale
A leveling-focused loadout does not need every Devil Fruit; it needs a coherent core. The strongest picks for solo play share two traits: they offer either sustained damage or reliable wave clear, and they keep you alive long enough to bank the Wave 10 payout. Fire Fist remains a top-tier pick because the ability spams cleanly, pairs with the Auto-Skip toggle, and clears grouped zombies faster than most alternatives.
For early sessions, the right pairing is a wave-clear fruit plus a single-target weapon. Wave-clear fruit handles the trash between boss phases, while the weapon dumps damage into elites and the boss. Once a build is established, the Fruit Zombie Survival weapon guide breaks down which weapons scale best into the late game and which ones to swap out before Wave 20.
| Role | Recommended Fruit | Weapon Slot | Why It Works |
|---|---|---|---|
| Wave Clear | Fire Fist | AoE melee | Fastest trash clear for solo farm |
| Boss Damage | Single-target fruit | High-damage weapon | Burst for Dune Marauder |
| Balanced | Hybrid fruit | Mid-tier weapon | Best for Progression Runs |
Ability Binds and Key Habits
Ability binds are a small detail with an outsized impact on leveling speed. Default binds put Dash on Q and the main ability on V, which works fine for casual play but slows down farming. The fastest levelers rebind their main damage ability to a key they can spam without lifting their fingers off the movement keys. Mouse side buttons or a comfortable key near WASD is the standard community recommendation, and it shows up repeatedly in player discussions of how to get better at Fruit Zombie Survival.
Two habits matter as much as the binds themselves. First, never stand still during waves; even with the best fruit, a stationary player loses HP fast once elites spawn. Second, buy Health upgrades before Damage upgrades during the wave countdown. The first 1,000 Berries should always go into HP so a single mistake does not end the run.
Fruit Zombie Survival Beginner Mistakes That Slow Leveling
The Five Costly Errors Most New Players Make
Most accounts plateau not because the game is unfair but because of a handful of repeating mistakes. Pinpointing these is a key part of any Fruit Zombie Survival solo guide, because the same five errors show up in nearly every stuck account. The list below is ordered by how much damage each one does to your leveling speed.
| Mistake | What Happens | Fix |
|---|---|---|
| Spending Berries on respawns | Bankrupt at Wave 6, no HP upgrades | Let the run end, reset, replay |
| Picking a weak starter fruit | Wave 5 wall, no AoE | Restart with Fire Fist or AoE fruit |
| Ignoring the wave countdown shop | Skip upgrades, die next wave | Always buy at countdown |
| Standing still in waves | HP melts, no time to react | Keep moving, kite in circles |
| Chasing every Devil Fruit drop | Loses boss damage, loses diamonds | Ignore mid-run drops after Wave 5 |
Why "Just Playing More" Does Not Work
A common assumption from new players is that more playtime equals more leveling. In practice, the opposite is true if the playtime is built on bad habits. Twenty minutes of a planned session beats two hours of freestyle grinding, because the planned session ends with a real upgrade banked and the freestyle session ends with a reset and a depleted Berry pool. This is exactly why mistakes to avoid in Fruit Zombie Survival consistently top the community advice lists.
The fix is to identify which of the five errors above you are committing most often, and attack that one first. A player who only misuses respawns can fix that in a single session. A player who is making three of the five errors at once should slow down, follow a written checklist, and rebuild the foundation before pushing for late-game waves.
The 3-Session Leveling Plan
Hour One: Lock a Fruit and Learn the Loop
The first session is about orientation, not pushing. Spawn in, test a wave-clear Devil Fruit, learn the controls, and intentionally die around Wave 5 so you can see how the reset and Berry economy work. The single most important outcome of Session One is choosing a starter fruit you understand and are willing to run for the next several hours. A bad fruit pick early on compounds across every later session, so taking 20 minutes here saves hours later.
Session Two: Reaching Wave 10 and Banking the Boss Drop
Session Two is the first real Progression Run. With a locked-in fruit, the goal is to reach Wave 10, kill the Dune Marauder, and bank the boss payout. Spend Berries on Health first during the countdown between waves, unlock one Damage upgrade before Wave 7, and save the rest for the boss. Reset immediately after the boss dies; the post-boss waves are bait for new players and burn resources for very little diamond return.
Session Three: The Colosseum Diamond Farm
Session Three is the first Diamond Farm Run. Set the party size to 1, enable Auto-Skip in the top-right corner, and spam the main ability until the Dune Marauder dies on Wave 10. Reset, repeat. According to the All Things How guide, this loop pays roughly 320 diamonds per run in about a minute, which works out to around 19,000 diamonds per hour sustained. That diamond bank funds every permanent upgrade for the next several sessions.
| Session | Goal | Stop Point | Expected Reward |
|---|---|---|---|
| Session 1 | Lock a fruit, learn reset | Wave 5-6 death | 0-2k diamonds |
| Session 2 | Clear Wave 10 once | Boss kill + reset | 5-8k diamonds |
| Session 3 | Diamond farm loop | Hour 1 mark | 15-19k diamonds |
Frequently Asked Questions
What is the Fruit Zombie Survival best way to level up for a new solo player?
Run a planned three-session rotation: Session One to lock a wave-clear fruit, Session Two to clear the Wave 10 boss for the first time, and Session Three to run the Corrida Colosseum solo diamond farm. This sequence banks roughly 19,000 diamonds per hour by the third session and unlocks the resources needed for permanent upgrades, which is the fastest sustainable path according to community data.
How long does it take to reach the first permanent upgrade?
Most players who follow the three-session plan hit their first meaningful permanent upgrade within 20-30 minutes of real playtime. Freestyle players typically take 45-60 minutes because they spend Berries on respawns and skip the wave countdown shop, so the run ends before any upgrade sticks.
What is the single biggest beginner mistake in Fruit Zombie Survival?
Spending Berries on respawns instead of HP upgrades. A respawn costs Berries that would have bought a Health upgrade at the next wave countdown, and the Health upgrade would have prevented the death in the first place. The second biggest mistake is ignoring the wave countdown shop, which silently costs more runs than any other error combined.
Can I level up without doing the Colosseum farm?
Yes, but it is much slower. Progression-only runs past Wave 10 pay well per wave, but they also take longer and risk losing the run to a single mistake. The Colosseum farm trades variety for consistency, and consistency is what drives leveling speed for solo players who only have an hour or two per session.
How do I know when to switch from farming to progression?
Once the diamond bank covers the next two permanent upgrades comfortably, switch back to a Progression Run and push for a new highest wave. The rule of thumb is: if a single death would not set you back more than 10 minutes of farm time, you are safe to push. If a death would erase an hour of progress, farm one more session first.