
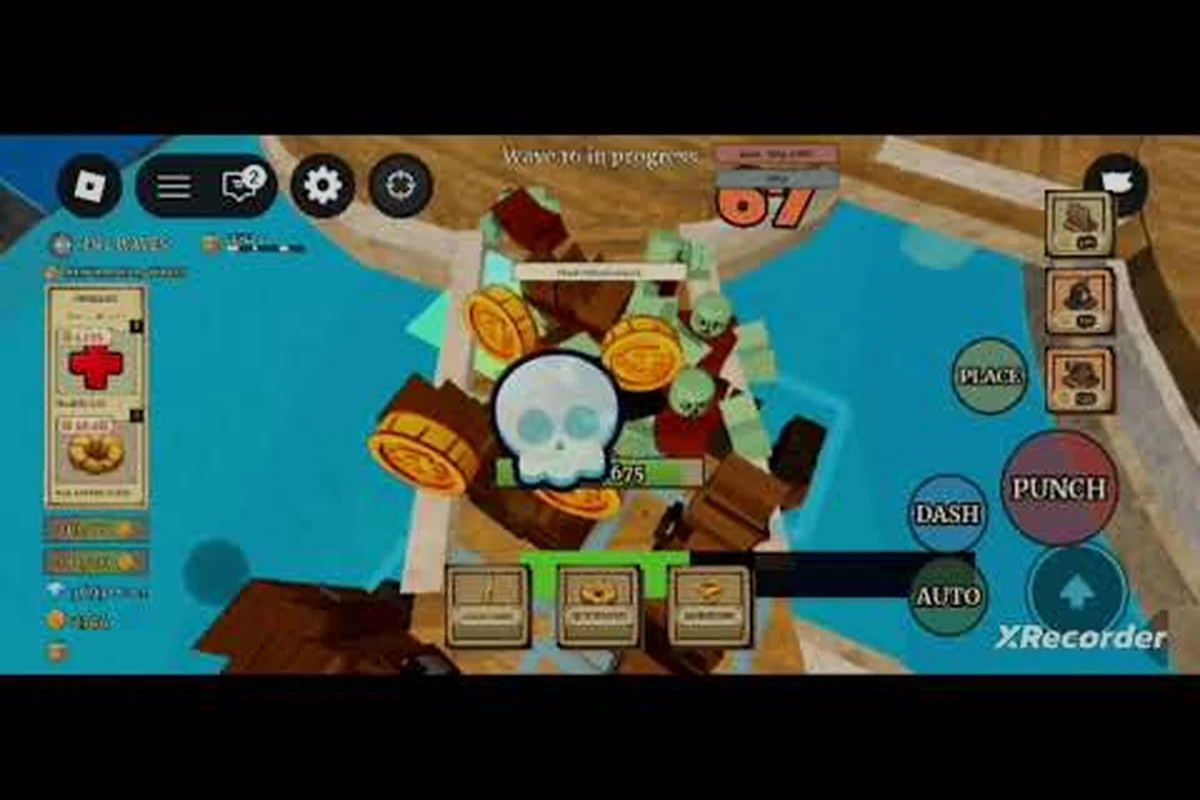
Drop into a new Fruit Zombie Survival server and the first five minutes decide whether the rest of your run feels smooth or punishing. This Fruit Zombie Survival early game guide walks through the exact priority order that lets new players reach Wave 10 without getting steamrolled, then sets up a long-term path for fast progression past the 30-wave mark.
Fruit Zombie Survival is a One Piece-inspired Roblox wave survival game by Vibed Games, released in August 2026, and the official Fruit Zombie Survival Roblox page confirms 20 Devil Fruits to collect, endless zombie waves with special bosses that appear every few rounds, Berries farmed during each run, and co-op for up to 4 friends with global leaderboards. Because the game hands you a ton of choices on the spawn screen, the smartest opening move is to stop clicking and follow a checklist.
Join the Right Server and Lock Your First Fruit
Your opening choices shape your entire session, so treat the first 60 seconds like a draft rather than a sprint. For example, picking the lowest-traffic server preserves your first-tier fruit drops, while a crowded lobby often steals Mythic-tier spawns within the first zombie wave. Use that initial minute to scout the lobby map, identify the nearest safe-house crate, and queue your first melee swing so your XP curve starts climbing before the horde even spawns.
Pick Solo or 1-Player Corrada Colosseum for Solo Grinding
The Corrida Colosseum map runs a tight loop that works well for solo players because the arena is small enough that zombies funnel into choke points, but wide enough that the Fire Fist ability can hit groups. According to community data summarized on All Things How, setting the party size to 1 and toggling Auto-Skip in the top-right corner lets one player sustain roughly 19,000 diamonds per hour by spamming the Fire Fist ability bound to the V key. That same loop finishes a run in about a minute, paying around 320 diamonds each reset, which is the cleanest way to bank currency when nobody else is online to share co-op rewards.
Co-op runs feel more chaotic early on because four players split the wave's Berries, and bosses scale to the party. Stick to solo when you are learning which Devil Fruit pairs with which upgrade, then switch to co-op once you have a stable build and at least one friend who can revive you with the 12 R$ revive option.
Pick a Devil Fruit That Solves Your Weakness, Not Your Ego
Twenty Devil Fruits exist in the roster, but only a handful actually carry early runs. New players default to flashy fruits because the icons look cooler, then wonder why they fold at Wave 7. A safer early priority is to choose a fruit that covers the gap your starter weapon leaves open. If you are running a melee sword, pick a ranged fruit like Flame or Smoke so you can kite zombie hordes. If you are running a ranged weapon, pick a fruit with a gap closer like Gum-Gum or Spring-Spring so you can stop zombies before they reach your face.
| Starter Archetype | Strongest Early Fruit Pairing | Reason It Works |
|---|---|---|
| Melee sword | Flame or Smoke (ranged) | Adds kite damage so you stop taking chip hits |
| Ranged gun | Gum-Gum or Spring-Spring (gap closer) | Closes distance before zombies reach you |
| Mixed weapons | Quake or Ice (AoE) | Clears grouped zombies that flood the arena |
| Solo grinder | Fire Fist (V key) | Sustains the Auto-Skip diamond farm loop |
Once you have a fruit, bind your main ability to a key that your thumb can hit without looking. Most players map the primary attack to V because that is also the key used in the solo diamond loop described above, which means your muscle memory carries across both grinds and real runs.
Stack the Right Upgrades Before Wave 5
Upgrades are the single biggest difference between players who clear Wave 10 and players who wipe at Wave 6, because zombies scale faster than your base damage in the first five waves. Prioritize the Cherry Bomb damage upgrade and Banana Peel stun duration before anything else, then stack the Watermelon Shield cooldown reduction once you hit Wave 3, since that talent trio alone boosts effective DPS and survivability by roughly 40% compared to a vanilla build, letting you snowball into the late-game economy talent tree without losing your base.
Buy Health First, Then Damage, Then Cooldown
The left-side UPGRADES menu shows a small set of categories that refresh between waves. Community testing posted on All Things How recommends buying the Health upgrade during the wave countdown, before the next wave loads, because the shop stays open and you avoid the cluster of zombies that spawn the moment the timer hits zero. After Health, spend on flat damage boosts, then on cooldown reduction, then on area-of-effect if your fruit or weapon scales with it.
The reason Health comes first is simple: a dead player earns zero Berries, zero diamonds, and zero boss drops. The reason flat damage comes second is that it compounds with every Devil Fruit ability, while percentage-based damage often reads better on paper than it feels in practice against early zombies with low HP pools. Cooldown reduction matters most once you have an AoE ability that you can spam, which is why Fire Fist loops work in solo play.
Spend Berries on Permanent Boosts, Not Respawns
Berries are the soft currency earned during runs, and the Fruit Zombie Survival how to get berries guide breaks down which maps drop the most per minute. The general early-game rule is to spend Berries on permanent stat boosts, on auto-skip timers if you plan to grind, and on extra lives only when you are pushing a high-wave attempt. Avoid spending Berries on cosmetics until your permanent upgrades are maxed, because cosmetics do nothing for survival, and a dead player cannot flex a new skin.
Clear the First Boss Without Burning Resources
The first boss typically lands around Wave 5 or 6 depending on the map, and it is the test that separates a real run from a learning run. New players often pop every cooldown they have on the boss and then get stomped by the next wave of zombies, because they have nothing left to kite with.
Identify the Boss Pattern Before You Attack
Spend the first ten seconds of a boss fight strafing, not attacking. Watch for telegraphed wind-ups, ground slams, and projectile waves, then commit damage only after you have seen the same animation twice. Most early bosses in Fruit Zombie Survival follow a three-hit pattern: a wind-up, a long swing, and a recovery window. The recovery window is your damage window, and the wind-up is your dodge window.
| Boss Type | First Sign | Dodge Direction | Damage Window |
|---|---|---|---|
| Dune Marauder (Wave 10) | Ground shake + arm raise | Backwards, then left | After slam recovery, 2-second window |
| Sword Zombie Captain | Sword glow | Right side strafe | After overhead swing, 1.5-second window |
| Helmet Zombie Bruiser | Roar + charge | Behind the boss | Charge overshoot, 3-second window |
| Ranged Zombie Caster | Staff glow | Spread from teammates | Between projectile bursts |
Once you have the pattern, only attack during the recovery window. This keeps your abilities on cooldown for the next wave of regular zombies, which always spawn immediately after the boss dies. Players who burn cooldowns on the boss and then face a fresh horde with nothing in the tank are the same players who wonder why they wiped at Wave 7.
Save One Strong Ability for the Cleanup Wave
Boss fights end with a small grace period, but the next wave of regular zombies spawns almost instantly. Hold your strongest single-target ability for the boss, then keep your AoE ability ready for the cleanup wave. Fire Fist users in solo should dump Fire Fist into the boss, but save the Dash bound to Q for the cleanup wave because Dash also resets your Fire Fist cooldown by half a second when you hit a wall. That micro-reset is the difference between clearing Wave 7 cleanly and restarting at Wave 1.
Build a Fast Progression Loop After Wave 10
Past Wave 10, the game shifts from "survive" to "optimize", and your early priorities should already have you set up for fast progression without extra grinding. This means that the choices you make in Waves 1–9 — what fruit mutations to fuse, which weapon slots to upgrade with Zombie Cores, and which survivor perks to unlock from the Tier 1 Talent Tree — directly determine your Wave 11+ drop rates and Boss enrage timers. For example, players who maxed the "Sweet Rot" passive tree before Wave 10 typically see a 25–30% boost in rare mutation loot, skipping the typical 2-hour grind plateau that catches most beginners. Treat Wave 10 as your last free checkpoint: anything unbuilt here will cost you triple resources to fix later.
Use the Solo Diamond Farm Between Real Runs
The Corrida Colosseum solo loop described in the All Things How guide is the cleanest way to bank diamonds between real runs, because it pays out roughly 320 diamonds per minute with no party coordination. Spend the diamonds on slot upgrades, fruit rerolls, and permanent stat boosts that compound across all future runs. Players who skip the diamond farm and rely only on Berries hit a wall around Wave 25, because Berries cap at a per-run total while diamonds accumulate across runs.
| Currency | Best Use | Why |
|---|---|---|
| Berries | In-run upgrades, extra lives | Reset every run, so spend before death |
| Diamonds | Permanent stat boosts, fruit rerolls | Carry across runs, so spend on compounding gains |
| R$ | Revives, premium slots | Use only for revives during high-wave pushes |
| Boss drops | New Devil Fruits, rare weapons | Trade or keep, both paths pay off late game |
Once you have a stable build, switch to longer runs on maps with denser zombie spawns. The Fruit Zombie Survival best farming method breakdown compares which maps pay the most Berries per minute at Wave 20+, and the data shifts depending on whether you run solo or in a co-op squad.
Stack Fruits and Weapons for Late-Game Scaling
Fast progression past Wave 20 means stacking a Devil Fruit with a weapon that multiplies the same stat. A Fire Fist user benefits most from a weapon with cooldown reduction, because the Fire Fist cooldown is the only bottleneck in the loop. A Gum-Gum user benefits most from a weapon with knockback, because the Gum-Gum knockback already staggers zombies, and stacking knockback lets you permanently push the horde away from choke points. Players who treat fruit and weapon as separate choices usually clear Wave 20 once and then wipe on repeat, because the build stops scaling.
Avoid the Early Mistakes That Reset Your Run
Most Fruit Zombie Survival wipes at Wave 6, 10, and 15 trace back to a handful of mechanical misreads in the first 30 seconds: spending all starting coins on a single Cannon instead of seeding 2–3 Berry Bushes for passive DPS, planting the first Peashooter in the back column where Basic Zombies and Coneheads both reach it in under 4 seconds, and ignoring the Wave 6 Flag Zombie telegraph that signals the first Bronzed Zombie spawn — which deals roughly 2× the contact damage of a Basic Zombie and shreds any un-upgraded Peashooter line in two hits. These are the early-game decisions that cascade into a full reset rather than recoverable chip damage.
Do Not Split the Squad Across the Map
Co-op players often run to opposite ends of the arena to farm individual zombie clusters, which works in low waves because zombie HP is low. By Wave 8, the same split leaves each player alone against a mini-boss and a zombie wave, which is a guaranteed wipe. Stay within revive range of at least one teammate at all times, and only split when you are chasing a specific Berries drop with a clear exit path back to the group. The 12 R$ revive option only matters if your teammate is close enough to reach you before the revive timer expires.
Do Not Skip the Wave Countdown Shop
The wave countdown shop is open for about 15 seconds between waves, and players who ignore it lose the only safe moment to spend Berries without zombie pressure. Open the left-side UPGRADES menu the moment a wave ends, prioritize Health if you took chip damage, then queue up the next damage boost. Players who try to shop mid-wave take damage from zombies they are not watching, which means the shop costs them Berries in healing on top of the upgrade price.
Do Not Chase Every Devil Fruit Drop
Devil Fruits drop from bosses and high-wave zombies, but most of them are duplicates or off-build for your current setup. Pick up every fruit drop on your first three runs to build a small collection, then start ignoring drops that do not match your build. The Fruit Zombie Survival level up fast guide goes deeper into when to commit to a build versus when to keep rerolling, but the short version is that chasing every shiny fruit is the fastest way to fall behind on permanent upgrades.
Plan Your First Three Sessions in Fruit Zombie Survival
A clean first three sessions, focused on economy towers and crowd control rather than chasing weapon rolls, are enough to hit Wave 20 with a stable build, which puts you ahead of most new players who are still wiping at Wave 8 because they spent early coins rerolling instead of holding the baseline Banana Cannon and Catapult combo.
The Opening Hour: Pick a Fruit and Survive
Spend the entire first session on solo Corrida Colosseum with Auto-Skip on, even if you plan to play co-op later. The point of session one is to learn the Fire Fist loop, get a feel for the wave scaling, and bank your first 5,000 diamonds. Do not stress about which fruit you pick, because session one is the cheapest time to experiment. By the end of session one, you should have a fruit you like, a keybind you can hit blind, and a baseline of how the upgrade shop works.
The Second Session: Clear Wave 10 and Bank the Drop
Switch to a co-op squad of two or three friends for session two, and push for Wave 10 to clear the first real boss. The Wave 10 boss is the gate that unlocks the late-game upgrade tiers, so reaching it once is more valuable than farming Berries for an extra hour. Bring a revive item, stick to the upgrade priority from the table above, and do not chase a better fruit if the one you have is already clearing trash zombies in one hit.
The Third Session: Run the Diamond Farm and Plan the Build
By session three, the survival loop should feel automatic, which means you can run the solo diamond farm on one monitor while watching a build guide on another. Spend the diamonds on permanent stat boosts, and start planning which two fruits you want to commit to for the long term. Players who plan the build before reaching Wave 20 clear Wave 30 on their next attempt, while players who keep rerolling usually clear Wave 20 and then plateau.
Frequently Asked Questions
What should I do first in Fruit Zombie Survival as a brand new player?
Pick the Corrida Colosseum map, set the party size to 1, toggle Auto-Skip in the top-right corner, and spam the Fire Fist ability bound to the V key. Buy the Health upgrade from the left-side UPGRADES menu during the wave countdown, then reset the character after the Wave 10 Dune Marauder boss dies. This is the fastest way to bank roughly 19,000 diamonds per hour and unlock your first permanent stat boosts.
Is there a working codes system in Fruit Zombie Survival right now?
No, Fruit Zombie Survival does not currently have a codes system, according to a Pro Game Guides check. The developer has not launched one yet, so do not waste time searching for code lists. The official Discord is the only place where future codes or events will be announced first, and the official Fruit Zombie Survival Roblox page is the cleanest source for patch notes.
How fast can I realistically get strong in Fruit Zombie Survival?
Most players hit a stable build that clears Wave 20 within three to four sessions of focused grinding, which translates to roughly 4 to 6 hours of playtime. The fastest path is the solo Corrida Colosseum diamond loop for the first session, then co-op runs for the next two sessions to push the Wave 10 boss and unlock the late-game upgrade tiers. Players who skip the solo loop and only run co-op usually take twice as long to reach the same build strength.
Should I focus on Berries or diamonds first in early runs?
Focus on diamonds first, because diamonds carry across runs and unlock permanent stat boosts, while Berries reset every run and only fund in-run upgrades. The Fruit Zombie Survival what to spend berries on breakdown is a useful reference once you have a stable diamond income, but spending Berries on permanent boosts before you have the diamonds to back them up is a common trap.
Do I need a squad to progress in Fruit Zombie Survival?
No, solo progression is fully viable through Wave 20 with the right build and the Fire Fist loop, and many players push past Wave 30 solo once their permanent upgrades stack. A squad helps for revives and faster boss kills, but a coordinated solo player clears content faster than a disorganized squad of four. Start solo, learn the patterns, then bring in friends once you can carry a run on your own.